The Secret to Meal Planning: Part 2 “Shopping at Home”

By Shanna Demers, neighborhood market manager:
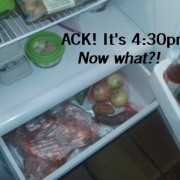
My favorite way to start meal planning is to take inventory of everything I have on hand. In other words, I shop at home.

[In case you missed it, here’s last week’s secret.]

This simple step was one I was missing when I tried to use prefabricated meal plans. Many meal plans have shopping lists prepared for you based on meals selected. I would print these nice little lists and head to the store, completely disregarding what I already had at home or had ordered from Seasonal Roots. This was the opposite of budget friendly! I was also buying weird products for recipes and never using them again. Last weekend I threw away an old jar of tahini I used once to make a sauce no one liked because of a meal plan. No wonder I was throwing so much away!

Now, before I decide what to cook, I determine what I have. Not only was I throwing away produce, but I was throwing away things that were buried in my freezer. You never want to find the last pound of that beautiful, pastured breakfast sausage bundle you ordered from Seasonal Roots covered in freezer burn! I was also freezing vegetables to help reduce waste, but… I didn’t know that they should be blanched prior to freezing. The veggies were almost always freezer-burned by time I remembered I had them. Talk about frustrating.

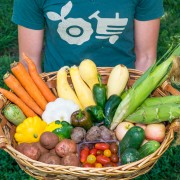
I’ve made some changes, and now let my order from Seasonal Roots and the freezer inspire my meal planning every Sunday. I have found I am saving money and time! One small change can make a big difference. Give it a shot this week. Before you head out grocery shopping figure out what you actually have. It’s often more than you realize.

Stay tuned for more meal planning tips next week. In the meantime, here’s a quick guide on how to freeze extra produce… the correct way, by blanching first!

    • Prepare a stock pot of boiling water.
    • Clean and roughly chop vegetables.
    • Prepare an ice bath for the blanched vegetables.
    • Place vegetables into a wire basket and lower into rapidly boiling water for a few minutes. The time depends on the vegetable. Here’s a good guide for times.
    • After blanching, promptly put vegetables into an ice bath. Once cool, drain and place in a freezer-safe container or baggie.
  • The Secret to Meal Planning: Part 1 “Throw out the rules!”

    By Shanna Demers, neighborhood market manager:

    It took me a long time to figure out how to successfully meal plan for my family. I kept trying different meal planning systems – trying and failing. I’m a neighborhood market manager for Seasonal Roots’ online farmers market and a busy, homeschooling mom, and I used to be an agriculture research specialist… if anyone should’ve known how to meal plan, it’s me! Why wasn’t it working? What was I doing wrong?!

    The thing is, there are a lot of websites out there that will tell you how to plan a week of meals. I’d get frustrated trying to follow their rules and lose all the joy that came with cooking and eating nutritious food. What happened to meal planning making your life better, right?!

    Well, better means different things for different people. For you, better may mean less time cooking, or less time shopping and more time cooking. Maybe you’re tired of wasting fresh veggies. I was. I would find myself standing in the kitchen at 4:30pm wondering how I could turn a pile of wilty swiss chard and semi-mushy zucchini into dinner. It was often easier to compost it or even worse, throw it away and opt for the broccoli from the freezer. It was NOT working.

    Meal planning IS the answer but everyone meal plans differently. I have diet restrictions and so does my daughter, but my husband can eat anything. Trying to make someone else’s meal plan fit our needs was a recipe for failure. Meal planning only started working when I figured out which rules fit our life. Then I threw the rest away.

    That is my secret to successful meal planning: Throw away the rules (not the fresh veggies)!

    In upcoming posts, I’ll tell you how I meal plan. I’ll also give you tips to help you figure out how YOU can meal plan. In the meantime, check out these free meal planning resources. Just remember: Keep what works, throw the rest away.
    http://realeverything.com/tag/meal-plan/

    http://www.thekitchn.com/danielle-walker-new-york-times-best-selling-author-of-meals-made-simple-tells-us-how-she-meal-preps-for-the-week-229368

    http://www.100daysofrealfood.com/our-free-meal-plans/

    http://www.realsimple.com/food-recipes/recipe-collections-favorites/month-of-dinner-recipes

    This next one has some sample plans, otherwise it’s a paid service.
    http://emeals.com/meal-plans/?utm_source=bing&utm_medium=cpc&utm_term=meal%20plans&utm_campaign=B_Meal%20Plan

    DO LIKE THE PILGRIMS

    sam 2This year, do like the Pilgrims and make your Thanksgiving fresh and local! For Thanksgiving week, our large baskets will set you up with almost everything you need. Sam, your Farm Connector guy, is working with local farmers to fill the baskets and researching recipes to make it easy for you. So each large basket will come with enough recipes and supplies to make 5 holiday sides for 4 to 5 people.

    Gotta feed more than that? Easy: Order more large baskets. If you also exercise your “extras” option to stock up on pies, the only thing you’ll have to handle is your holiday protein of choice (turkey, ham, roast, tofurkey) – we’ll leave that part of the big feast up to you.

    All Thanksgiving week deliveries will be made on Wednesday November 23. That includes members who live in the Hampton Roads and Richmond areas. Even though you normally get your delivery on Thursday, you’ll get it the day before Thanksgiving on Wednesday. That way, no matter where you live, every member will get your baskets in time to prepare for the holiday.

    So go ahead and check “sides & desserts” off your to-do list. Plan on placing your order for one or more large baskets a week and a half from now and look forward to enjoying the holiday!

    Fresh and Easy: Oven-Roasted Rosemary Potatoes

    Once the weather starts to cool down a bit, Sunday afternoons turn into my most cherished part of the week. In my opinion, it is hard to top a day that revolves around family, food, and fun! Whether we are preparing for the week ahead, trying out a new recipe, or cooking our favorite pot of chili, I almost always get to spend some time in the kitchen with my family on Sunday afternoon.

    With Fall finally deciding to show its face this past weekend, we kicked off our season of Sundays with an afternoon of yard work, football, and a healthy dose of cooking together in the kitchen. All three of our children helped bake a batch of Oatmeal Chocolate Chip Cookies and my 7-year-old was the self-appointed sous-chef for the evening. She is extremely independent, especially in the kitchen, so I tried to choose a menu that would complement her skills and allow her to do a large amount of the preparation on her own. We ended up making grilled shrimp, Oven-Roasted Rosemary Potatoes, Brussels sprouts, and a large salad for dinner, and she was an excellent assistant!

    Kennebec potatoes and rosemary were part of my Seasonal Roots basket this week, so I decided to make one of our family’s favorite fresh and easy sides: Oven-Roasted Rosemary Potatoes. I love this recipe because it is easy to make, it goes with almost anything, and everyone will eat it. My daughter was able to make this dish with very little assistance on my end, and she was extremely proud of the final result.

    Kennebecs are a hefty, universal potato with an oblong shape and stouted ends. They have a thin skin, a firm and starchy flesh, and minimal water content, making them a popular choice for potato chips and French fries. Fans of the Virginia-based Route 11 Potato Chips can vouch for their yumminess!

    rosemary potatoes 2

    Kennebec potatoes can also be baked, mashed, or roasted, and work perfectly in potato salads, curries, soups, and stews. Just remember to leave the skin on the potato so you can take full advantage of the nutritional benefits that it has to offer, including potassium, niacin, riboflavin, thiamin, vitamin C, and fiber.

    rosemary potatoes 4

    Oven-Roasted Rosemary Potatoes

    Ingredients:

    1 ½ pounds Kennebec potatoes                                                                                                                            (you can also use red, fingerling, or a mixture)

    1/8 to ¼ cup of olive oil

    2 tablespoons fresh rosemary, minced

    3 cloves garlic, minced

    ¾ teaspoon salt

    ½ teaspoon ground black pepper

    Directions:

    Preheat oven to 400 degrees F.

    Chop potatoes into uniform bite-sized pieces and place in large bowl with olive oil, rosemary, garlic, salt, and pepper.

    Toss until potatoes are evenly coated and spread out evenly onto a baking sheet.

    rosemary potatoes 3

    Bake for at least 1 hour, tossing a couple of times throughout, until browned and crisp. Season to taste and enjoy!

    rosemary potatoes

    *If you aren’t already a Seasonal Roots member, come join us. It is the easiest way to ensure that your family has access to fresh, locally grown food on a weekly basis, and we deliver to your doorstep for free!

    Sarah Young is a wife, mother of three, Certified Health Education Specialist, and healthy living advocate. She has a background in Dietetics and a B.S. in Health, Fitness, and Recreational Resources with a concentration in Health Promotion. She is also a writer for several local and online publications, an ambassador for the Jamie Oliver Food Foundation, and a health contributor for ABC 7 News/WJLA. In her spare time, she enjoys running, hiking, gardening, and spending time with her family and their dog, Maple.

    Fall: Sweaters, Friday Night Football, and Butternut Squash!

    Is anyone else ready to pull out their sweaters, go to a Friday night football game, and come home to a big pot of stew? I am officially ready for Fall, and was so excited to see that Mother Nature is [almost] ready to get on board through last week’s Seasonal Roots Market selections. Some of my favorite cool weather items are starting to pop back up, proof that fall is knocking on our door. Apples, Swiss chard, potatoes, kale, and butternut squash are just some of the items that our members will have access to in the coming weeks, and I think that you will be able to taste the difference in our locally grown, “Dirt to Doorstep” produce. Fresher ingredients not only taste better, but they are more nutritious, too! If you are not already a Seasonal Roots member, what are you waiting for? Come join the party!

    This week I received two beautiful butternut squash in my Seasonal Roots basket, so we had double the yum! I made one of our favorite go-to weeknight sides, Oven-Roasted Butternut Squash, and I decided to experiment with a new recipe later on in the week, Butternut Coconut Curry. Both recipes were delicious and left me feeling excited about the promise of fall and its bounty. What are some of your favorite cool weather recipes?

    Oven-Roasted Butternut Squash

    Preheat oven to 400 degrees.

    Peel and chop 1 medium butternut squash. Toss squash with a little olive oil and salt (or cinnamon), place on a baking sheet, and roast for about 20 minutes, until tender.

    butternut squash

    Butternut Coconut Curry

    Ingredients:

    1 cup peeled and cubed butternut squash

    ¾ cup chopped yellow onion

    1 cup fresh cauliflower florets

    1 can (15 ounces) chickpeas, rinsed and drained

    ½ cup frozen green peas

    1 cup diced red or fingerling potatoes

    2 tablespoons olive oil

    2 tablespoons minced fresh garlic

    2 tablespoons flour

    1 ½ tablespoons curry powder

    4 cups vegetable stock

    1 teaspoon ground pepper

    Salt, to taste

    1 cup coconut milk

    Lime wedges, optional

    Directions:

     Heat a large Dutch oven over medium heat. Add olive oil, onion, and garlic. Sauté for 5 minutes.

    Add flour and curry powder; cook 1 ½ minutes or until flour begins to brown, stirring constantly. Stir in butternut squash, cauliflower, peas, and potatoes. Add vegetable stock, pepper, and salt; bring to a boil over medium-high heat. Reduce heat to medium-low and simmer for 15 to 20 minutes, until vegetables are tender.

    Remove from heat and stir in chickpeas and coconut milk. Serve with lime wedges, if desired.

    Sarah Young is a wife, mother of three, Certified Health Education Specialist, and healthy living advocate. She has a background in Dietetics and a B.S. in Health, Fitness, and Recreational Resources with a concentration in Health Promotion. She is also a writer for several local and online publications, an ambassador for the Jamie Oliver Food Foundation, and a health contributor for ABC 7 News/WJLA. In her spare time, she enjoys running, hiking, gardening, and spending time with her family and their dog, Maple.

    A Healthy Twist on a Southern Tradition

    When you think of traditional Southern food, what comes to mind? Sweet tea, collard greens, black-eyed peas, fried chicken, hushpuppies, okra, Smithfield ham, and sweet potato pie are at the top of my list. In fact, I just described what a traditional Sunday dinner used to look like at my great grandmother’s house. I can still remember sitting at a small table tucked into a side corner of her kitchen, watching her cook and taking in all of the wonderful smells that she was creating in the process.

    While sweet tea, fried chicken, and hushpuppies haven’t made it to the Seasonal Roots market, I have come across several other traditional Southern favorites, including collard greens, black-eyed peas, and one of this week’s basket items, okra. I don’t remember eating the okra that was on my great grandmother’s dinner table, but I have had it throughout the years in soups or stews and maybe once or twice when eating out. It has been hanging out in my “take it or leave it” vegetable file. I would probably have never picked it up at the grocery store to bring home and cook, but I wouldn’t turn it away if it was offered to me, either. Fortunately for my taste buds, I was sent me home with a bag of Okra this week to experiment with in my own kitchen. Thank you, Erin!

    I think that just about everyone thinks of fried okra when they think about traditional Southern foods, and with good reason. It is one of the easiest ways to prepare this vegetable and avoid the dreaded “slime” that is often associated with okra. I’m personally not a fan of fried foods, so I decided to find a healthier cooking alternative while experimenting this week. In the end, I tried out two methods: Oven-roasting and sautéing. Both turned out to be successful in our house and peaked my interest in cooking more with this interesting and versatile vegetable. Grilled okra is next up on my list. How do you prepare okra in your kitchen?

    Easy Oven-Roasted Okra

    It doesn’t get much easier than this, friends! For a delicious, slime-free side of okra, simply chop okra into 1/3” pieces and place onto a baking sheet. Drizzle with olive oil, season with salt and pepper, toss, and bake in the oven at 400 degrees for about 10-12 minutes, until slightly tender.

    okra


    Indian-Inspired Okra

    Ingredients:

    1 pound sliced fresh okra                               ½ teaspoon ground coriander

    1 medium onion, chopped                              ¼ teaspoon ground black pepper

    2-3 tablespoons butter                                   Salt to taste

    ½ teaspoon ground cumin                           ½ teaspoon ground ginger

    Directions:

    1. Melt butter in a large skillet over medium heat. Add chopped onion and cook until tender.
    2. Add okra and remaining ingredients to the skillet and cook for a few minutes, stirring to combine ingredients. Reduce heat to medium-low, cover, and cook until tender (stirring occasionally). Enjoy!

    okra 3

    Nutritional Benefits of Okra: There are a lot of healthy reasons to love okra. It is low in calories (just 30 calories per 100 grams) and full of dietary fiber, vitamins (A, B, E, C, and K), and minerals (iron, zinc, magnesium, potassium, and calcium).

    Come join Seasonal Roots today!

    Sarah Young is a wife, mother of three, Certified Health Education Specialist, and healthy living advocate. She has a background in Dietetics and a B.S. in Health, Fitness, and Recreational Resources with a concentration in Health Promotion. She is also a writer for several local and online publications, an ambassador for the Jamie Oliver Food Foundation, and a health contributor for ABC 7 News/WJLA. In her spare time, she enjoys running, hiking, gardening, and spending time with her family and their dog, Maple.

    Seasonal Substitutions

    No matter how hard we try to keep an eye to the sky – sometimes mother nature just doesn’t comply with the plans we have for the weekly baskets. If a storm blows through, or the weather is too hot or too cold, sometimes an entire crop is not able to be harvested. Your local farmers harvest your orders on Mondays and Tuesdays and if your farmers are unable to fill an order for an unforeseen reason, it is our policy to issue a substitution for basket items (but not extra items that are added to your order). That means we will offer a comparable crop in place of the one we can’t get our hands on. For example, we might send you yellow squash instead of zucchini, sweet potatoes instead of kennebec potatoes, or perhaps white peaches instead of the yellow variety.

    There is such a short turnaround time between when the farmers harvest and when we pack that usually by the time we know a crop is unusable, it’s time the pack the baskets! As such, a substitution is the best solution for making sure you get the closest alternative to your first choice crop. Substitutions are one of the unique challenges that come along with a commitment to eating locally and we appreciate you being understanding when they occur!

    Easy Stuffed Peppers: Simply Perfect!

    Summer is officially over in our house, which means that the kids are back in school, fall sports are in full swing, and our schedule is busier than ever. When our outside world seems to get a little hectic, embracing simplicity within our home has been the key to finding a happy and sustainable family balance. Why make life more complicated and stressful than it needs to be?

    As much as I enjoy cooking, I am always looking for new ideas and ways get healthy, wholesome meals on the table for our family without having to spend hours in the kitchen each and every day.

    Quality Whole Foods + Simplicity in the Kitchen = 1 Happy Mom

    (and hopefully some delicious, stress-free meals!)

    I recently came across a recipe that brings this equation to life. These Easy Stuffed Peppers are perfect for appetizers, sides, or the main course.  With just 3 simple ingredients and minimal effort, you can put together a delicious dish that allows the main attraction (PEPPERS) to shine and is sure to keep everyone coming back for more!

    Stuffed Peppers 1

    In addition to their beauty and taste, peppers offer many health benefits to you and your family, to include:

    • Rich in antioxidants
    • Boosts immunity
    • Excellent source of vitamins C and A
    • Good source of fiber
    • Low in calories
    • Anti-inflammatory
    • Helps lower bad cholesterol
    • Helps improve eye health

    What’s not to love?

    Easy Stuffed Peppers

    Recipe by Sommer Collier

    Ingredients:

    1 ½ pounds of mini bell peppers (or a mix of mini bell peppers and jalapenos)

    12 ounces garlic and herb seasoned chevre goat cheese

    1 tablespoon REAL honey

    Stuffed Peppers 2

    Directions:

    1. Preheat oven to 400 degrees F. Line a large baking sheet with parchment paper and set aside.
    2. Cut peppers in half lengthwise and remove any seeds. Lay peppers cut-side-up on the baking sheet. Spoon the seasoned goat cheese into the center of each pepper half.
    3. Lightly drizzle the peppers with honey and sprinkle with salt if desired. Bake for 10 minutes, then serve warm. Enjoy!

    Optional Toppings: Various herbs, crumbled bacon, balsamic glaze, smoked paprika, toasted nuts.

    Stuffed Peppers 3 (2)


    Sarah Young is a wife, mother of three, Certified Health Education Specialist, and healthy living advocate. She has a background in Dietetics and a B.S. in Health, Fitness, and Recreational Resources with a concentration in Health Promotion. She is also a writer for several local and online publications, an ambassador for the Jamie Oliver Food Foundation, and a health contributor for ABC 7 News/WJLA. In her spare time, she enjoys running, hiking, gardening, and spending time with her family and their dog, Maple.

    Tomatillos: Taco Tuesday’s Unsung Hero

    I know that I have mentioned this several times before, but one of my favorite things about being a Seasonal Roots member is the opportunity to learn about, experiment with, and try new foods with my family that we would probably not pick out on our own that the grocery store. This week’s basket was full of many familiar faces in addition to a bonus “newbie”: Tomatillos.  I literally had no idea what these interesting little guys were. Thankfully, one of my fellow Market Managers was willing and able to fill me in and offer some advice on cooking and preparation. Thank you, Lisa!

    tomatillos

    In case you have also been in the dark, tomatillos are small husked fruits that originated in Mexico and are a member of the nightshade family. If you are a fan of authentic Mexican food you have likely sampled tomatillos, as they are a key ingredient in many Mexican and Central-American dishes. Salsa Verde, Enchiladas Verdes, and Guacamole Taquero are just a few examples of popular dishes that allow the tomatillo’s green color and tart flavor to shine through.

    I admit that I was a little embarrassed about my lack of familiarity with this ingredient since our family absolutely LOVES Mexican food, and I am positive that we have eaten dishes that contain tomatillos on more than one occasion. I’m not sure what I thought the “green stuff” was, but now we all know.

    We decided to play it safe with our first family tomatillo culinary experience by making a Salsa Verde. It was easy to make, had great flavor, and the leftovers can be used to dress up a fish dish that we have planned for later on in the week. Taco Tuesday just got a little more real in our house, y’all.

    tomatillos 3

    Tomatillo Salsa Verde

    Recipe by Kimberly Binning

    Ingredients:

    1 pound tomatillos, husked

    ½ cup finely chopped onion

    1 teaspoon minced garlic

    1 serrano Chile pepper, minced

    2 tablespoons fresh cilantro, chopped

    1 teaspoon dried oregano

    ½ teaspoon ground cumin

    1 ½ teaspoons salt, or to taste

    1 ½ – 2 cups water (depending on desired consistency)

    Lime juice

    Directions:

    1. Place tomatillos, onion, garlic, and Chile pepper into a saucepan. Season with cilantro, oregano, cumin, and salt. Pour in water and bring to a boil over high heat. Reduce heat to a medium-low and simmer until the tomatillos are soft, about 10-15 minutes.
    2. Using a food processor or blender, carefully puree the mixture in batches until smooth. Stir in freshly squeezed lime juice to taste. Serve with your favorite tortilla chips, as a topping for enchiladas, or to dress up fish or chicken.

    Sarah Young is a wife, mother of three, Certified Health Education Specialist, and healthy living advocate. She has a background in Dietetics and a B.S. in Health, Fitness, and Recreational Resources with a concentration in Health Promotion. She is also a writer for several local and online publications, an ambassador for the Jamie Oliver Food Foundation, and a health contributor for ABC 7 News/WJLA. In her spare time, she enjoys running, hiking, gardening, and spending time with her family and their dog, Maple.

    We May Be An Online Farmers Market…

    But, there are some real (and not at all virtual) folks working behind their screens to make sure you get your local deliveries! From the farmers who harvest your crops, to the artisans who craft your baked goods, to the packers who assemble your order, and the Market Managers who deliver it – it takes a village. Here at Seasonal Roots, we have one of the best villages around! Today, meet Alyssa (left), and Melanie (right).

    Alyssa is a seasoned Seasonal Roots pro, she began work with us as a Market Manager, and now is the responsive-problem-solver managing our support emails. If there is an issue with a delivery, inquiry about how to order online, or simply a request for a recipe – Alyssa handles it all. She’s knowledgable about everything from how to best store your produce, to how to manage your account, to our farmers’ growing practices. For those of you who have had the pleasure of working with Alyssa, we thought you might like to put a face to the ever-helpful name that coincides with support emails.

    Melanie is our Chief Operating Officer! She’s been part of the team for years, wearing many hats along the way. Now, she is the logistics wizard who makes sure that your basket is packed correctly, and makes it to your doorstep. Melanie is the brains behind managing our new ordering system, and goes above and beyond to ensure exceptional customer service. For example – Alyssa sadly moved beyond our delivery area, and has been missing her weekly deliveries. The solution? When Melanie recently headed out of town, she packed up a box of local goodies and delivered it to Alyssa and her family on the way out.

    Thank YOU for being part of our village – together we continue to support local farmers and businesses.