9 simple grilling tricks
The do’s & don’ts, plus how to grill the perfect grassfed steak
– By the Veggie Fairy Team:
Although fatherhood has absolutely nothing to do with a person’s ability to captain a grill, Father’s Day does happen to land right as grilling season is getting underway. So whether you’re an alpha-griller dad or a guy who likes to kick back and watch someone else do the sweating in all those clouds of smoke, we veggie fairies salute you with this guide to grilling fresh, local food!
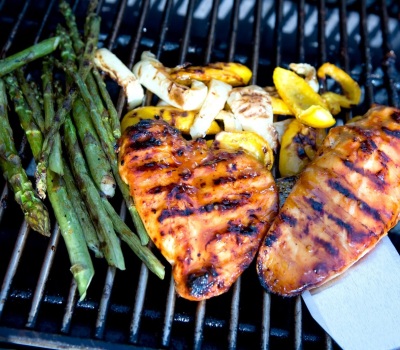
Anything you can cook inside in your oven or on your stovetop, you can cook outside on your grill — that includes fresh local fruits and veggies in season, as well as grassfed meats and other proteins. You can even grill blueberries (which are now in season here in Virginia) as a delish topping for your protein. Or use them to make a mouthwatering, outlaw kinda pie — (here’s how.)
More of our advice here applies to grilling meat because it’s trickier than grilling produce. And this is not a comprehensive list of all the great tricks out there — just 9 simple grilling tricks for cooking up your favorite local food in the great outdoors.
Trick #1: Starting the fire
DON’T use lighter fluid if you have a charcoal or wood burning grill. Just don’t. It’s dangerously flammable, smells bad, and gives off toxic fumes. It shouldn’t be anywhere near your fresh, local, healthy local eats.
DO use something called a charcoal chimney – wad up newspaper and stuff it in the bottom, put charcoal on top (more coals for more food, fewer coals for less food), then light the paper. Your coals will ash over nicely in about the same amount of time as when you use lighter fluid. If your grill uses gases, preheat it too, so the cooking grate is hot enough to make the food sizzle when you put it on.
Trick #2: Fire size
DON’T build one big fire. It forces you to cook everything at the same temperature and tends to burn things fast.
DO create two zones. Place charcoal or wood to one side of the grill, or turn on the gas on only one side of the grill, leaving the other side empty or flameless. The “direct” zone is where the heat source is. Use it for direct heat cooking, like searing meat with the lid open. The “indirect” zone away from the heat source is for indirect heat cooking. In general, use this zone to gently roast your food with the lid closed. Having two zones also gives you more control over how fast things cook as you move them around on the grill.
Trick #3: Spacing
DON’T crowd the grill.
DO leave enough room between all the food items to work with each one and ensure even heat distribution. The intensity of the heat changes in different areas of the grill. In addition to creating the two cooking zones, get to know where the hot spots and cool spots are and move things around as needed to keep them from burning or overcooking.
Trick #4: Cooking temps
DON’T cook things like ribs or pork butts over too hot a grill.
DO cook those chunkier cuts more slowly. Once the grill is heated up, place ribs or larger cuts of meat on the grate in the indirect zone and close the lid. For faster-cooking fish and chicken on a charcoal grill, you can use fewer coals or let the coals cool down a bit. Ribs and pork butts, though, need higher temps even when you’re cooking more slowly over indirect heat.
Trick #5: Cooking time
DON’T guesstimate when it comes to cooking meat.
DO use an instant-read thermometer. Stick it into the meat’s thickest part to get an accurate read on doneness.
Trick #6: Steak! (And chops!)
We’re going to take a little detour here, because grassfed steak and chops require some extra TLC to get them right — and by right, we mean tender, not tough and chewy.
To grill the perfect steak…
Trick #7: Watching
DON’T. Don’t open the lid too often to watch your big hunks of meat cook over indirect heat.
DO… not peek. Every time you open it, you let heat escape, which reduces the temperature and affects the cooking time. You could well wind up with the unhappy surprise of unappetizing, underdone meat. If you have to feed a fire, get a hinged grate that will let you quickly add coals or wood chips and keep the fire steady during a long grilling session.
Trick #8: Sauce
DON’T add sauce too soon. The sugar in the sauce will caramelize and burn.
DO start basting with the sauce during the last 10 minutes of cooking. Or even better, use a spice rub and let the magic happen on its own between the rub, the juices, and the smoke.
Trick #9: Cleaning
DON’T fail to clean the cooking grate. There is no such thing as a self-cleaning grill.
DO scrub the grate after it has cooled with a wad of aluminum foil or a non-metal bristle brush. DO NOT USE A BRUSH WITH METAL BRISTLES. Now and then the tiny bristles fall out, and if one gets left on the grill, it can wind up in your food and get stuck in your throat… until you go to the ER to get it unstuck.
So after you’ve scrub the grate clean, oil the grate with a rag or paper towel soaked in vegetable oil. To reduce the amount of food that sticks to the grate in the first place, oil your food before cooking. Or wait a little longer before turning to give it time to caramelize or acquire nice black grill marks. At that point, it will let go of the grate more easily.
Now go forth and grill and enjoy the smoky flavor of flavorful, nutrient rich, grilled local food in season!
ABOUT SEASONAL ROOTS
Since 2011, Seasonal Roots’ online farmers market has connected Virginia families with local family farmers who use sustainable, humane practices. Our veggie fairies – mostly moms who believe in living better through scrumptious, healthy eating, being kind to animals, protecting the environment, and spreading joy – home-deliver freshly harvested produce, eggs, grass-fed dairy and meat, plus artisan fare. We empower our members to eat better and live better with more nutritious, flavorful food that’s good for us and good for the planet. More info at seasonalroots.com.

